Portfolio and Design Journey For The Intro Sequence
Research
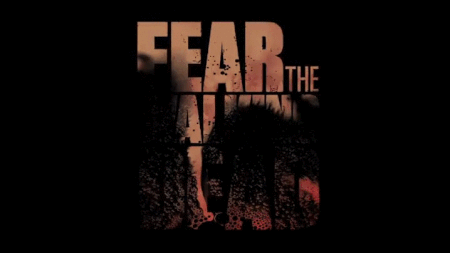
•When it came to the inspiration for my ideas, there was mainly only two places I could turn to. In order to grab some ideas for styling and colouring for the sequence, I looked into the intro sequences for the show The Walking Dead and Fear The Walking Dead. The Walking Dead hits the nail on the coffin when it comes to zombie drama introductions, showing off discoloured imagery to give the show a worn-out feel, almost making the objects in the sequence appear worn down over time. On the other hand Fear The Walking Dead’s intro sequence, towards the start of the shows life cycle, was more simplistic, using a piece of heavily edited typography editing blood splats into the main title itself, sending the viewer a very dramatic message.

The Planning
•I knew the sort of intro sequence I wanted to design, but the big question for me was how? I knew I wasn’t overly skilled at using Adobe After Effects, but I knew what I wanted to try. I began by referring to both the script and treatments I had written for Hugo Smith since the intro sequence was designed for that show. After reading through both of the documents, I started by finding scenes of significance, such as locations and uses of weaponry. From this, I went out to get some shots using my personal camera, a Panasonic Lumix G7. I got shots at the First Direct Arena to resemble the stadium from the treatment, a corridor that can be easily viewed as a stadium or warehouse corridor, followed by some shots of various weapons used in the show, such as a crowbar and a baseball bat wrapped in barbwire. I knew I would also need an introduction section, with a colour setting that would make the section more natural, so I used a glass of water, slowly dropping Japanese ink into it to give a blood-like effect.

Colour correction and Premiere work
•The next step for me was to do some colour alteration to the clips appearing. I wanted to change all the clips to give them an over-saturated look, giving off the appearance the clips had degraded with age. I altered the colours for the Pint and steak knife shot, the arena, Corridor, crowbar and baseball bat scenes. I did all this in Adobe Premiere as I am very familiar with the software and how to use the colour correction features. In Premiere I also adjusted the scale of all the videos, zooming in on them slightly so I can create a slight panning effect with some clear space for me to later place text.


Section 1 - Construction
•The first section of the sequence is mainly a light opener, giving off the appearance that life is somewhat normal. This is until the ink hits the water, meant to resemble blood drops spreading across the water, which was created by using ink. The section also consists of simple text highlighting the production studio and the company responsible for the show. Each part of the text uses an effect that gradually reveals each letter like a decoder, cycling through various other letters until the correct one is on screen. No camera tracking was required as the only moving clip needed no text placement.

The Transition to Abnormal
•The transition however proved to be a challenge. This was the first time I had attempted to use masks and by the end, I was really proud of the results. The process began by separating the end section of the ink clips and setting the effects to spiral and zoom in on a section of the ink. Once I got to the correct zoom, I used the pen tool to mask out the area to reveal the stadium. At first, the mask wouldn’t operate properly, but with a small bit of tweaking, the mask begin to work revealing the stadium on the other side. For an added effect, I added a light burst effect to make the transition seem more impactful.

Section 2 – The Stadium
•The following sections, I was really able to go creative with. Using the stadium I had already edited in Adobe Premiere, the first thing I did was place the camera tracker, and let it scan for the motion points that I can attach text to. I knew I wanted to attach the text to the floor and have it locked in place as the camera pans. After choosing the area I wanted, I set the ground point for the tracking and created the text layer. From this, I was able to not only resize and move the text but also apply a 3D tilt to make it seem more attached. To keep consistency, the text uses the same intro animation as the previous section. The original plan was to attach fire to the windows of the stadium to give the sense that the place was burning down, but that proved too much for my computer to render.

Section 3 – The Pint
•For the shot of the pint and steak knife, I spoke to the manager at the pub I work at, who gave me the permission required to film on-site even for a small shot. Much like the stadium, the same concept applies, panning camera, discoloured imagery done prior etc. Again, I used the camera motion tracker to show the points I could attach text to in order to lock it in place as the camera panned. I used the same text and text animations to keep consistency.

Section 4 – The Bat
•The baseball bat shot had to be done at home as it is an item I personally own, and I knew it would be perfect for the sequence. Much like the previous clips, the camera motion tracker highlighted the points for me to attach text onto and to keep it in place, sticking to the same font and effects as previous sections. The bat was mainly included as it would be a weapon of choice for one of the characters throughout the series. The position of the text had to be moved in order to keep attention to the bat, but when filming I made sure their was plenty of space in order to place text in other places.

Section 5 – The Crowbar
•The crowbar shot, much like the bat, was filmed back at home as this was an item in my garage that I knew would be perfect to represent a character's weapon of choice. Similar effects were added to the text to match the rest after placing the camera tracker on. However, due to my shaking hands whilst filming the tracker has a big job keeping the text in place which is evident in the footage.

Section 6 – The Hallway
•The final shot of the hallway originally had a lot of possibilities. The first iteration consisted of blood splats motion tracked to the walls, with the director and screenplay writer stuck to the floor as the camera moves back. However, due to both software and hardware limitations, the idea had to trimmed down. However, the second version I believe proves to be equally impactful. Following the same layout of text attached to the floor, I instead used the lens flare effect and it opacity variation options to create a flickering light that attaches to the lighting on the ceiling, give the atmosphere a more dramatic effect.

The Music
Now, I’m not a musician, but I had a go. At first, the original idea was that I was going to create something synthetic, electronic sounding. But after completing the sequence it dawned on me that it would not fit the tone I was after. So on the second iteration, I used only 3 instruments, a bass piano and guitar with a shimmer effect piano over the top. To me this creates the necessary amount of tense music to get across that the show is not for the light-hearted, or a happy series, instead of putting the impression that the show is very serious.

Sources Used to Help With My Work
https://fonts.adobe.com/fonts/shlop
The font used for the text
https://www.youtube.com/watch?v=9rMZVHk3gDI
Used to learn how to motion track
https://www.youtube.com/watch?v=RqRZimBmWGs
Used to help with the mask transition at the start of the sequence
https://www.youtube.com/watch?v=E0ruESAnQ7s
Continued to help me understand how to properly use masks
https://www.youtube.com/watch?v=as3yfEueHb4
Used to help create the flickering light effect seen in the final scene.
The lectures hosted by Ashley Dean at LBU